Showing posts with label Birthday. Show all posts

Tuesday, November 20, 2012

Happy Birthday, Inspired Stamps!

Inspired Stamps turned TWO yesterday, and to celebrate the design team made birthday cards! I used my highly favored Butterflies and Blooms stamp set along with the Perfect Sentiments birthday stamp.  I didn't quite center it so I could write the date and name of the person whose birthday it was in the ledger from the October Afternoon paper pad. 


Supply List:
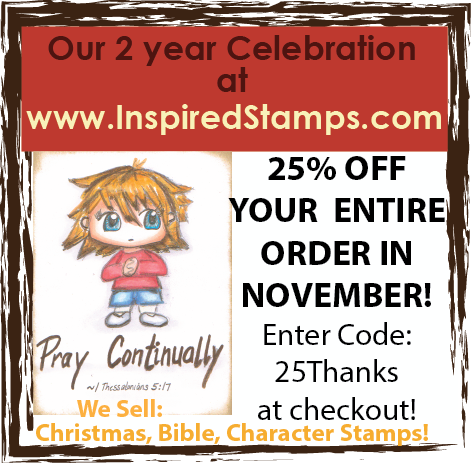
Thank you so much for stopping by my blog today, and don't forget to check out the AWESOME sales Inspired Stamps is having! Not only can you use the coupon above, but the owner put out another sale on her Facebook page yesterday that is good until today!

Thank you so much for stopping by my blog today, it means so much to me!  And I also want to wish my fellow American friends a wonderful Thanksgiving!  

Inky and glittery fingers for all!
-Gaby

Monday, June 11, 2012

Ginger Snap Scraps DT: Bring on the Bling!

So as you can see, I used a lot of bling. Because this week is Bling It On with the Ginger Snap Scrap's Design Team! I made a shaker card for my dear friend I've known since I was 14, Joy. She loves the color yellow, so I tried to incorporate as much as I could into the color palette. All you need to make a shaker card is a Nestablities die from Spellbinders and a manual die cutting machine like Cuttlebug. To make the shaker recessed into the card you can use foam or scrap cardboard like I did. There's heaps of videos out there on YouTube if you'd like to give it a whirl. All the items I used are listed below in the thumbnails. The beads for the shaker material are from my local craft store. The Unicorn, star stamps, and banner's sentiment is from the Lawn Fawn Critters Ever After stamp set and I wrote the happy birthday bit below.


Hope you like it and thanks so much for taking the time to stop by my blog today!

Inky and glittery fingers for all!
-Gaby


Update:
It made it to Alabama without getting unched and Joy loved it! She Instagramed it on Facebook. :)


Entered into Simon Says Stamp and Show: Anything Goes Challenge!

Thursday, March 1, 2012

Sweet Stamping Treats

Pin It
This week's card features SST's Mouse Treat digi stamp. I Copic colored the mouse and paper pieced him to a die cut tag I splattered with mists and covered the edges with Tim Holtz Tissue Tape. I cut out the lollipop separately and coated blue baker's twine with Glossy Accents and coiled it around the lollipop. I liked that when it dried it looked glossy like a giant hard candy lollipop would look. Then I took two different colors of scrap chevron patterned paper and cut strips and adhered them down. Tied a bow at the top with linen thread and added a tiny flag with a sentiment stamped on it. I stamped "Happy Birthday" inside, I think it would be a cute card for a little boy's birthday.

Thanks so much for dropping by my blog today! I really appreciate it!

Inky and glittery fingers for all!
-Gaby

Sunday, February 26, 2012

Birthday Card for My Hubby

Pin It
Last week was my husband's birthday so I made him a manly card, hahaha well semi-manly. The tin man is definitely more manly than say a teddy bear, right? I actually was hoping the tin man came off more like a robot, which I think it did. I used a woodgrain paper from Studio Calico and distressed it with my Tim Holtz Distressing tool and ran over the distressed bits with Vintage Photo Distress Ink. Totes manly, no? ;) For the banner I stapled it on slightly askew with my Tiny Attacher, also from Tim Holtz. The super cute Tin Man is from Karber's new clear stamp set, Karber Wizard of Oz! The Balloon is from Lawn Fawn's Admit One stamp set and the happy birthday sentiment is also from Lawn Fawn and is part of their Sophie's Sentiments set.

Thanks so much for dropping by!

Inky and glittery handsome fingers for all!
-Gaby

I entered this card to Lawnscaping Challenges #28: Distress Mania!


Wednesday, February 8, 2012

Sweet Stamping Treats: Blue and Yellow Challenge

Pin It
Hello, blog friends! This week the Sweet Stamping Treats design team was challenged to make projects with the colors blue and yellow. I chose to use their Baby Raccoon stamp from their February new releases. I cut a bunch of shapes with my trimmer and used my Elegant Edges Cricut cartridge to cut the scalloped die cut. Copic colored the cutie raccoons and added googly eyes to them. For the raccoon in the party hat (I'll just call him the birthday boy) I made a teeny tiny poof ball out of blue and yellow twine and adhered it with glossy accents. Affixed some self sticky pearls and stamped the sentiment with Colorbox chalk ink on a hand cut flag. Hope you like it!

Thanks so much for dropping in!

Inky and glittery fingers for all!
-Gaby

Thursday, September 1, 2011

My take on beach botanical ...

Pin It

My friend Tamra asked me to make a birthday card for her friend somewhat like the card I made for her birthday last year. That her friend liked the beach and flower gardens and that she wanted her friend's name, April, on the front of the card. This is what I came up with and I'm pretty happy with it. I used a mask from Prima and a bunch of acrylic paints to make the background. Then I misted over it with gold and apricot colored glimmer mists. I really like how it turned out. It was trial and error for me though! I first tried to use the masks with mists and it was a no-go as the mists just rain under the plastic mask. Then I tried using distress inks with a foam tool and that just bent the fine bits of the mask ....so that's when I thought gently dabbing on acrylic paints with a stiff brush would work best.

I first attempted to hand write the "happy birthday" on the card like I had done for Tamra's card last year. Sadly I messed up and had to cover it. I had received these canvas sticky back rolls from a Two Peas challenge win and thought I could save my card by stamping out the sentiment with Stayzon brown ink with Lawn Fawn's Smitty's ABCs. The only problem was that the canvas was a wee bit too transparent so I had to adhere it to a piece of paper first then cut it out and adhere to the card. In the end it looked really cool seeing the tiny white flowers on orange through the canvas. I added some Stamp'n Up corduroy brads to add a lil something extra to give it the look of it being tacked up by the brads.

For the bottom embellishment I used a die cut from the Paislee Nantucket collection, a wish ticket from Tim Holtz, and a metal butter fly from Close to My Heart.

The green outer border is washi tape from Amy Tangerine.

Every thing was edged in Tim Holtz's Vintage Photo before adhering and lastly I sprayed it ever so slightly with the Gold Glimmer Mist. Of course I felt it wasn't enough so I sprayed it once more, but this time with Sand Glimmer Mist.

I just sent the picture of the final product to my friend, I hope she likes it!

Inky and glitter fingers for all!
Gaby