Friday, January 13, 2012

Whom do you love?

Pin It
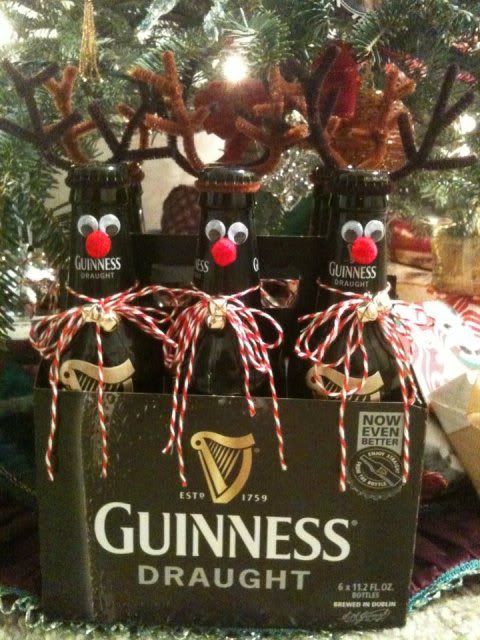
I have heaps of left over googly eyes from making my husband Reinbeer for Christmas. So I thought I'd do a card with an owl since they've got such big eyes. I also just got a parcel today from Two Peas with Valentine's goodies inside. We all know my love of puns, so really it wasn't too hard to think of what I wanted to do for a card today!

I started off Copic coloring in the owl, nothing fancy, at all. Since the googly eyes were self sticky, I just peeled the backing off and adhered them directly to the Owl's eyes. I got the new Doodlebug Valentine's twine and thought I'd take it a lil over the top and add a teeny tiny bow to the owl's ear. Using my Cricut I die cut two hearts in two different shapes. Stamped the Kraft heart with Hero Art's woodgrain stamp using Versa Mark ink and sprinkled sea foam embossing powder on it. After I heat embossed it and let it cool, I glued it to the center of the red Doodlebug polka dot paper and set it aside. I cut a piece of Pebbles 'I Heart You 12X12 With Love Collection' cardstock about a 1/4 of an inch smaller than my Kraft card base and adhered it down. I used the branding strip on that same piece of Pebbles paper for the strip of hearts and punched a scalloped boarder of Kraft to layer it on top of. Lastly I wrapped some more of the Doodlebug Valentine's twine around it three times and adhered that portion of the card to the Kraft card base. Attached the two hearts and then the owl went on last. Finally I stamped the sentiment with Lawn Fawn's Smitty's ABCs and the card was done! :)

Pin It
Here's another variation I made with a Hampton Arts owl with balloon stamp and a boarder made out of Hero Art's Sweet Hearts Clear Stamp Set and Copics.

Thank you all so much for entering my blog candy giveaway! I can't believe I'm up to almost 40 followers! You all rock! To sweeten the deal ...If I hit 50 followers before the giveaway ends I'll add some extra "sugar" into the prize!

Inky and glittery fingers for all!
-Gaby

Sunday, January 8, 2012

Blog Candy!!

Yay, we made it to 30! Thank you so much for following my blog! The picture of the blog candy is in the post below. It contains four Studio Calico limited mini sets that came with their kits and one full set with telephones and clocks. There's a mini Lawn Fawn stamp that says 'Thank You' that is only available when you order directly from them. A mini Technique Tuesday set with icicles. Two Prima flower sets, one with roses that is blue and pattered and the other are smaller daises with pearl centers. A Jenni Bowlin silver floral rub on sheet. A BoBunny flower from their Gabrielle collection. A full Close to My Heart set that features Helen Keller quotes & large daisy flowers with separate individual leaves and a mini honey bee set. There's also a Tim Holtz distress embossing powder in Corduroy. A Prima washi-like tape that has a peel and stick backing to it that is brown with white musical notes printed on it. Two Doodlebug twine letter sticker sets in bon bon & swimming pool and a set of their red jewels. A package of Mistable fabric die cuts with their own peel away backings. Last, but not least a set of Bloomer fabric and button flowers by Basic Grey.

HOW TO WIN!
You must be a follower of this blog and comment on this post for the initial entry. To follow you need to click the follow tab on the upper left corner of the blog in the blogger bar or click the blue "join this site" tab that is below my profile and above those who already follow.

For additional entries:

1)Have a friend follow my blog and comment here again with their user handle or name for another entry.

2)Post a link to my blog and share this post about the candy on Facebook and comment here again for another entry.

3)Post a link to my blog on Twitter with an @gablow and come back here and comment again.

4) "Like" my Facebook page and come back here to comment once more.

The more times you comment on this post, the more entries you get! Make sure to comment here after you've done any of the tasks above!

I will post the winner next Wednesday, January 18th using random.org. Thank you so much and I hope everyone had an awesome weekend!

Inky and glittery fingers for all!
-Gaby

Saturday, January 7, 2012

Blog Candy Sneak Peek


Just a sneak peek at the very first blog candy I'll be giving away once I have 30 followers! More details to come. :)

Friday, January 6, 2012

Karber Challenge

Pin It
This card I made with the adorable Karber clear stamp set, Hawaii. Being a girl from Hawaii, I just had to have this set! I made this card to submit to Karber's current challenge for January, Use Some Bling!


For this card I paper piece the heck out of the lil hula wahine! I stamped her ti leaf skirt on some Bo Bunny vinyl ribbon with brown StazOn ink and cut it out. I ran a green apple Copic marker along the edges of the ribbon where I cut it to make sure it blended in well and there wasn't any white fabric showing. I stamped the haku lei on her head again and colored it and placed tiny bits of bling in the center of each flower. I mostly wanted to paper piece the haku lei to give it some dimension. Plus it let me be a lil more carefree when Copic coloring. Side note ...I used the flash for this picture, so the color looks a lil off, but you can see the bling a bit better.

For the base I cut four scrap pieces into small squares and applied them down in a color blocking like look. Then I cut two circles on my Cricut, one 1/2 inch larger than the other. On the blue circle I stamped the Aloha sentiment from the stamp set repeatedly till it covered the entire circle. I colored in the sun from the same set it yellows with a hint of orange and adhered it to the top right slightly off the circle. For the banner on the bottom I embossed the Aloha sentiment on a strip of paper and cut out in a rectangle with two slightly smaller rectangles. I edged them both with an orange Copic to make sure no white core was showing. By adhering the center part with the sentiment with foam adhesives and the two flags with tape runner adhesives, it gave it a 3-D look. I curled up the ends of the flags a smidge for bit more dimension and I then I was finished.

Thank you again for the continued support of my blog with the comments and followers! Only one more follower needed and I'll post the blog candy! I'm so excited! I'll post a picture here soon! I've got heaps of goodies wanting a new home! :)

Inky and glittery fingers for all!
-Gaby

Monday, January 2, 2012

Another for Lawn Fawn's CHA challenge.

Pin It
Just another submission for Lawn Fawn's CHA and catalog challenge. This one I stamped the background with the cotton candy stamp from their Admit One set and colored them in blue and pink. Which cotton candy tastes better to you? There's a difference, you know! ;) I'm going to have to go with blue, though I'll take pink in a pinch.

For the Polaroid image, I stamped the Polaroid from their Say Cheese set and cut it out, including the center. On a separate piece of cardstock I cut out a square just a smidge larger than the center I cut out. On that I stamped the Ferris wheel from the Admit One set slightly off to the side and colored it in with Copics. I added the gems again and this time a lil bit of gold stickles. Then I cut out the dog from the Critter's in the Burbs set. The first thing I did was color in the center of the dog's collar tag with Ranger's embossing pen. Then I sprinkled silver embossing powder and heat embossed it for a metal look. Then I colored him in with greys and a red collar with Copics. I did one last cotton candy in pink and cut it out. I also decided last minute to color in the sky area in a light aqua. Then I set the Polaroid cutout over the square with the Ferris wheel and decided where I was going to attach the dog with the cotton candy. Once I got it in place I attached the dog and cotton candy with foam adhesives. Only then did I glue down the Polaroid in place. Before adhering the finished piece to the card base I tied two colors of twine in a bow at the bottom. Once everything was adhered I did faux stitching hashes with a white gel pen.

Thank you all so much for all the awesome comments, they all meant so much to me! And a special thank you to all my new followers! I'll be doing a blog candy giveaway once I reach 30 followers, only four more to go! I'll make an official post once I start the giveaway.

Inky and glitter fingers for all!
-Gaby

Friday, December 30, 2011

Lawn Fawn CHA Opportunity!

Pin It
It's a long shot, but I thought I'd try make a couple cards to enter for Lawn Fawn's newest contest. The contest is for an opportunity to be published in their latest catalog and to have your project displayed at their booth at winter CHA! So I decided to do a twist on an old favorite of one of my very first Lawn Fawn cards I ever made.
Pin It
I first stamped the clouds from their Bon Voyage stamp set in Versa Mark ink and sprinkled sea foam embossing powder over them. After I heated it with my heat gun and let it cool for a bit, I went over the entire piece of paper with Tim Holtz's distress stain in Tumbled Glass. Before it had a chance to dry I used a finger foam tool to blend in some of the distress ink (not stain) in Tumbled Glass to the sky around the clouds. Then I spritzed it with an October Afternoon opaque white sprinkler spray. I dabbed off as much as I could, then went over the sky parts around the clouds again with the distress ink and finger foam tool.

I stamped the Ferris Wheel then cut the insides out with an exacto knife. It's always best to cut before you spend time and waste ink coloring when using an exacto knife, just in case you mess up with the exacto knife. Trust, I've learned this the hard way before! I just colored it pretty simple with Copics and adhered mini gems to the tops of the Ferris Wheel cabins and one larger one in the center. I always see real life Ferris Wheels with lights on them, so adding the bling kind of reminded me of the fancy lights of the Midway. Once everything was ready I adhered it with foam adhesives to the cloud paper background.

For the tickets I did pretty much the same, except I distressed the side edges a bit with my distress tool so that they'd look like they were freshly torn from a giant spool of tickets. I adhered the center ticket first with a slightly thicker foam adhesive and then the other two were added with the thinner foam adhesives. I also wrapped some green baker's twine under the Ferris Wheel to kind of ground the wheel so it didn't look like it was floating in the sky. Grass I guess.

The last thing I did was cut my, "You make my world go round" stamp into two separate stamps so that I could curve it a tad and stamp it horizontally. Lawn Fawn stamps are super easy to cut because they're so well made! I can easily piece them together on my acrylic block if I want to go back to using the stamp as it was intended. I stamped out a banner from Lawn Fawn's Bannerific stamp set and stamped the sentiment on it. Then I added some Copic coloring and cut it out. I layered it on a couple pieces of plain cardstock to give it a lil height, but not too much.

Thanks so much for stopping by! And thank you so so much to my new followers! You're all awesome! When I reach 30 followers I'll post a contest for a random draw for a huge stash of blog candy to give away as a thank you!

Inky and glittery fingers for all!
-Gaby

Monday, December 26, 2011

Lawnscaping Challenge #24, Texture.

Pin It
Well girls and boys, it's the last Lawnscaping Challenge of the year and it's all about texture! I love texture on cards and scrapbook pages. Nothing else can quite make a paper project pop more than a touch of texture.

This image from Pintrest was my inspiration for this card. After seeing this, I really wanted to make a Valentine/Love card with embroidered hearts! :) The thing I love about Valentine items is that you can use them year round. This card could easily be a Valentine, but also works for a, "Hey, I love you!" card as well. Just as long as you don't stamp Valentine anywhere on it, but use excessive amounts of hearts.

Pin It
For my texture I decided to use embroidery, Grunge Paper, and foam adhesive. I also stamped hearts with Lawn Fawn's Teeny Tiny Backdrops in red ink over Fancy Pant's One Heart Love Story Paper. I think it added a wee bit of texture while still keeping the paper flat. For the Grunge Paper all I did was stamp the dog, fox and shakers on it and cut it out. Then I adhered it to the back of the regular card stock that I stamped and Copic colored for a bit of a dimension. After the glue dried I adhered the dog and fox with foam adhesives to the paper I stamped. Then glued the shakers on with regular glue to the animals. This way the shakers are still propped up a bit because of the Grunge Paper, but not with the foam adhesive because they were too small. The last thing I did was add a heart sticker that is sewn up the middle and set on a piece of foam adhesive.

Thanks so much for stopping by and I hope your holidays were/are merry and bright! It's amazing how time flies by so fast! I can't believe in a week's time it will be a new year already!

Inky and glittery fingers for all!
-Gaby

This card was featured on Lawn Fawn's Fawny Flickr Friday blog post on January 9, 2012!

Thursday, December 22, 2011

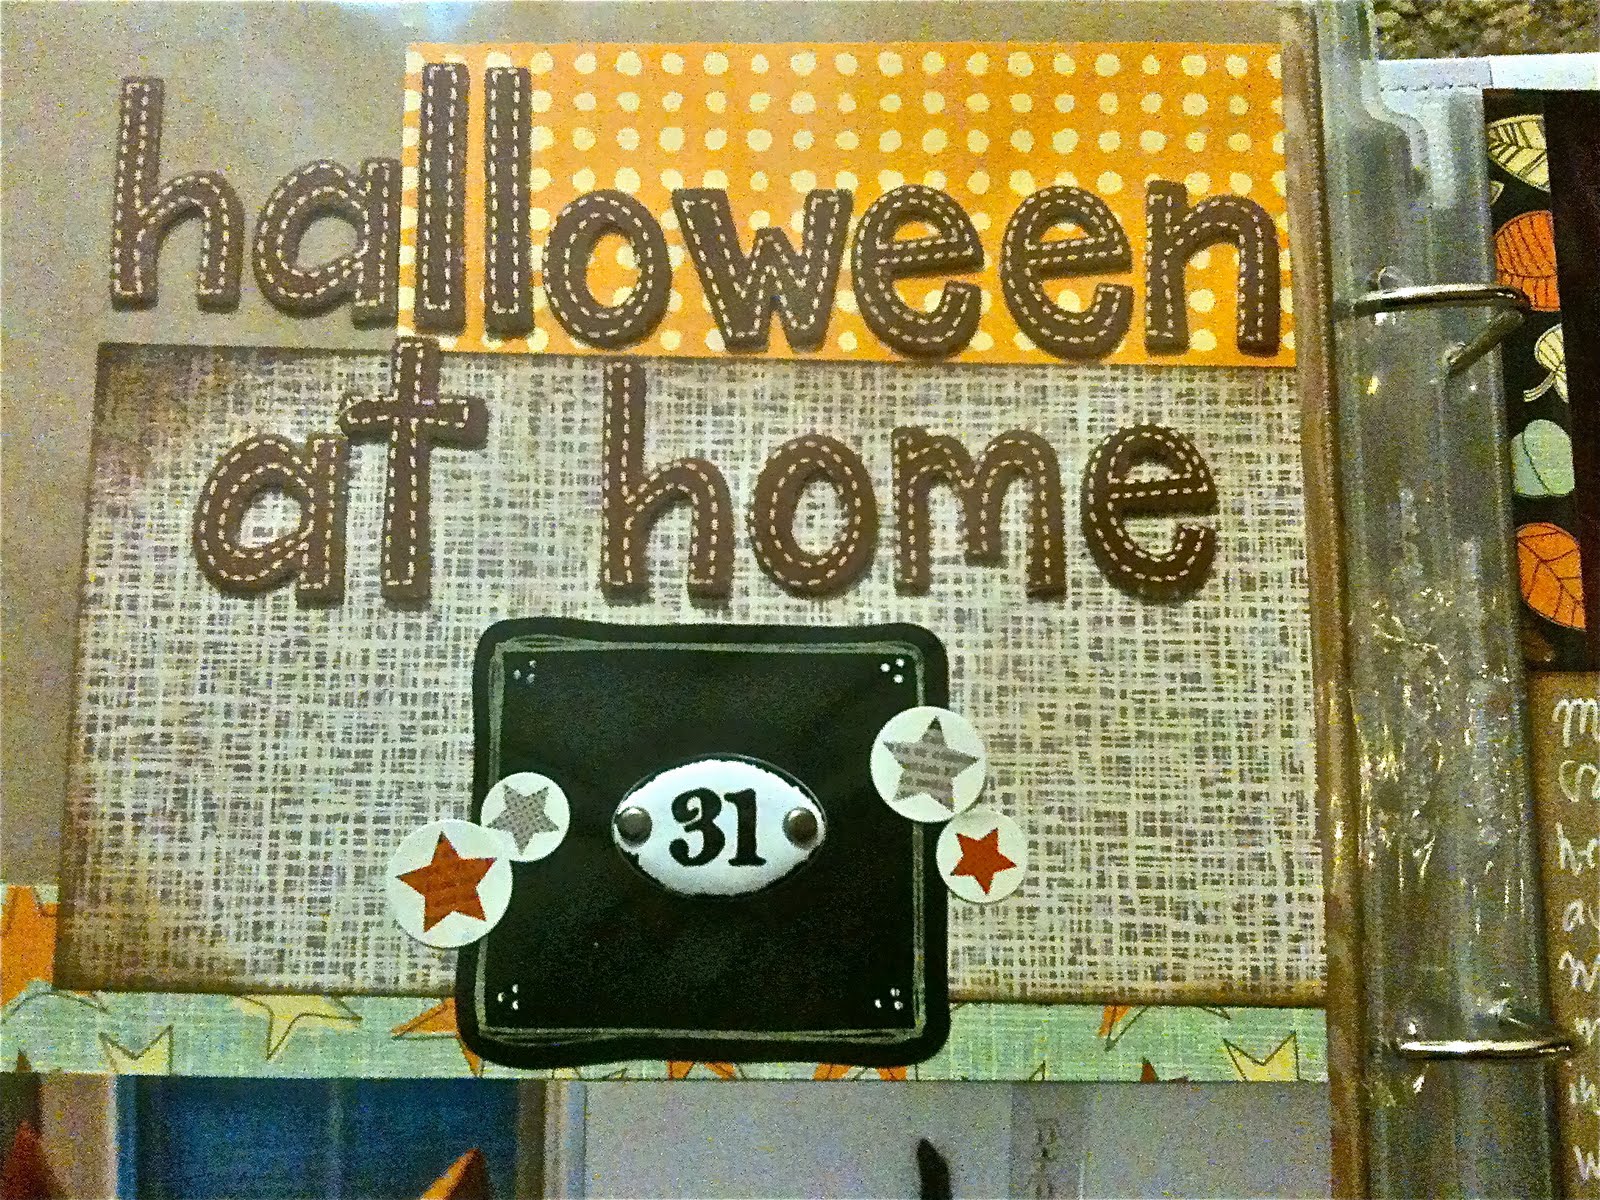
Halloween at Home, 4x6 Photo Love


This is a sketch by Shimelle Laine that uses 11 4x6 photos on one layout. I changed the layout a tad because I had mostly portrait photos. All the photos on this layout that were portrait were taken with my iPhone. When I use my iPhone for pictures I tend to take more portrait photos than landscape, mainly because it can be a little awkward to hold the phone in the landscape position. However, if I use my regular camera they almost always end up landscape, funny yea? It was a little difficult to photograph this layout for the blog simply because it was interactive with that center half page that held six 4x6 photos. I felt I needed to photograph them in my album to get the full effect.

I used some different fall papers and Tim Holtz's autumn distress inks. I also got the chance to finally use the American Crafts' Nightfall chalk board stickers. Basically they're just black cardstock stickers, but they look a lot like chalkboards. I used a white gel ink pen on them and I love the way they turned out! I also used a Tim Holtz "31" Plaquette that I had been hoarding for a Halloween page. The scalloped edge at the bottom is from Martha Stewart, it's her Scallop Dot edge punch. The patches are from American Crafts and the stickers are from Echo Park. I basically hoard anything that has a black cat on it because I love them so much. So I put as much black cat goodness on this layout as I could! I'll put some more close up pictures below .....


Thanks so much for stopping by! If you have any questions please don't hesitate to ask!

Inky and glittery fingers for all!
-Gaby

Monday, December 19, 2011

Three 4x6 Photos

Pin It
This is a layout I did with three 4x6 photos. I like to do new and fresh designs, but I almost always keep it "old school" with 4x6 photos. I love this layout because one would think you'd need to stick with patriotic colors when doing a page about Washington, DC. You never have to stick to any specific color scheme, you can do whatever your heart desires, but still keep it pretty!

For this page I used Bo Bunny papers, Acrylic paint spatters, ribbon, and SRM stickers. By putting stars, gold paint splatters and the Washington DC stickers from SRM I feel even though the colors are not the norm, you can still see the patriotic feel.

Thanks so much for dropping by!

Inky and glittery fingers for all!
-Gaby

Wednesday, December 14, 2011

Lawnscaping Challenge #23, Tags or Treat Bags

Pin It
Another fun Lawnscaping challenge! This week's was all about tags and treat bags. Since it's the holidays I chose to make a gift tag. I'm infatuated with Lawn Fawn's Making Frosty Friends stamp set. Maybe it's the Hawaiian/Southern girl in me longing for a white Christmas, but snowmen and snow flakes around the holidays make me happy.

I saw this picture on Pinterest and it just looked so pretty! So I decided to encase the snowman and penguin in an icy snow sheath.

I started off cutting out a tag on my Cricut with white cardstock. I stamped snow flakes from two different Lawn Fawn stamp sets (Making Frosty Friends and Critters in the Snow) with Versa Mark and then sprinkled with white embossing powder. After tapping off the excess embossing powder I heated the snowflakes with my heat tool. Once it cooled I blended two blue distress (broken china and stormy sky) inks with a distress stain in tumbled glass and sponged off any excess ink with a paper towel. Then I free handed some snow hills and out lined them in Copic markers and stickles and adhered them to the bottom of the tag. Because the plastic (just some excess packaging from a cheap-o digital camera) I ran through the Cuttlebug and embossed with a snowflake pattern was pretty thick, I decided to back the animals and tree with some thin chip board so that they stood out more by adding dimension. I had a snow making pen and decided to add some puffy snow on the snowman's hat poof and to the tree. I also added some mini bling and pearls to some of the snowflake centers and three black gems for the snowman's coal buttons. Tied a bow at the top of the tag with some doodlebug Christmas twine. If you have any questions, please leave me a comment or send me an e-mail and I'll get back to you as soon as I can!

I hope you like my tag and thanks so much for stopping by!

Inky & glittery fingers for all!
-Gaby

This project was chosen as Top Mow It All at Lawnscaping!