Showing posts with label Tutorial. Show all posts

Friday, October 26, 2012

Inspired Stamps 12 Weeks of Christmas Tutorials

OK, bloggers. I get a wee bit out of my comfort zone when I'm not making a card or scrapbook page, but here's my go at making a custom travel mug. Also, please excuse the blurriness of some of the photos, I have a three year old iPhone 3gs that desperately needs to be upgraded. lol My DSLR camera would have been too bulky in my tiny little craft nook. Also, photographing shiny cylindrical things is hard! ;)
I first ordered this travel mug from Amazon.com. It came with a black background for the customizable bit, but because I was using washi tape, I needed a white background. Also, they don't give you too much room for bulk, so I used thin printer paper. Card stock wouldn't be pliable enough and it also would have added too much bulk.

Here's a picture of me holding down the black paper that came with the mug because it was already bent into the shape of the mug from being inside it for so long. I held it down with one hand and with the other I used my trusty Hello Kitty pencil and traced its outline on the thin white printer paper. Once traced, I cut it out.
You're going to want to make sure your new paper fits after you've cut it, adjust as needed.
Then I lined the paper, starting in the center, with washi tape in a diagonal.
I stamped out Inspired Stamps' Christmas Poinsettia stamp and began coloring it with two different Copic colors. I use this line coloring (I have no idea if that's the official name) technique when coloring: it gives some dimension and depth.
Then I blend another lighter color (I used peach) to blend them all together. Later I go back and add some more dimension with a darker color, then blend again with the lightest color.
Here's the Poinsettia inside the mug acting as the seem holder.
The left side of the photo (my adorable husband and kitty), the Merry part of the sentiment at the bottom of the photo, and the Poinsettia.
The right side of the photo (me and our shiba inu), the Christmas part of the sentiment, and the other side of the Poinsettia. I hope you liked my tutorial. If you have any questions, please feel free to ask. Please come check out next week's tutorial on Friday on the Inspired Stamps Blog. Also, there are a lot of giveaways this week and the next with the sneak peek of the new releases happening, be sure to check it out! AND there's a 40% off your most expensive item in your order, with no minimum purchase required. 

Supply List:

Inky and glittery fingers for all!
 -Gaby

Wednesday, April 4, 2012

Made Especially For You: Craft 'n Chat!

The design team was asked to share a technique with Made Especially For You's blog readers. For my Craft 'n Chat post I'll be showing three different ways to use mists.


For my first technique I'm going to use four different mists to ink up a large background stamp. It's important that the mists not be opaque as that can muck up your stamps and they also dry a lot faster than clear mists. Studio Calico Mr. Huey's Mists work really well for this technique. I also used a glimmer mist which worked well too, but if I had another that didn't have glitter I would have preferred to use that instead.


Mist up the stamp really well trying not to mix the colors up too much. Dab off any that pooled heavily (like the green bit you can see in the middle right edge) with a paper towel lightly, trying not to remove too much of the ink. You really just want to remove enough that it won't drip when you turn it over to stamp.


Sadly the pink and the orange are a little too close in color to really show up in a photo, but I promise it was pretty in person.


Next I'm going to paint a woodgrain stamped image with these three colors using a water paint brush.


You only need to use the water feature of the water paint brush if you're going to use an opaque mist. So if you're not using one, a regular dry brush would work just fine! If you are you'll notice it'll cover too much of the stamped image when you paint it on, so just thin it out with a little bit of water till you're happy with the result. I shook the gold mist up and unscrewed the top off. I dipped my clean paint brush directly into the bottle and saturated the brush completely. Then I painted the stamped woodgrain image I had previously stamped in Memento Tuxedo Black ink. It's important to stamp your stamp in an ink that won't run and will stay put! Another fun thing to do is heat emboss the stamped image before beginning to paint it for a resist technique. Just keep running the paint over the stamped image till you're happy and then repeat with the other mists, making sure you rinse the brush as you go along so that you don't contaminate your mists. To dry faster you can use your heat tool. I then ran some Vintage Photo Distress ink along the edges and smudged a little in the center.

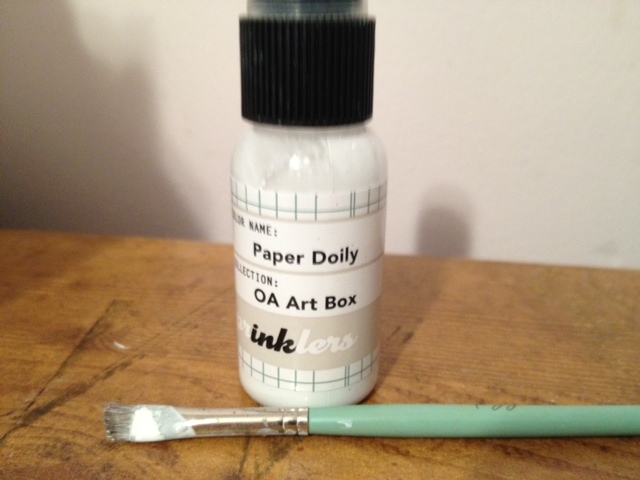
The last technique I'll be showing you is a white wash. For this you'll need an opaque white mist or a cream. I used October Afternoon's White Doily. You'll also need a dry brush. I used an old makeup brush.


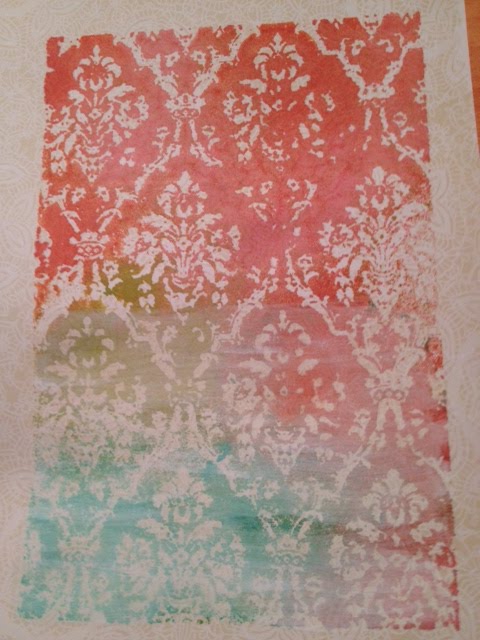
You can see that I started white washing from the bottom and stopped about half way up to let you see the before and after. I usually white wash from left to right, but you could to it from top to bottom, too! Really, it's all about what makes you happy!

I hope you enjoyed my mini tutorial! Please let me know if you have any questions and I'll be sure to get back to you with an answer as soon as I can!

Thanks so much for stopping by my blog and reading my technique post! Be sure to come back Monday April 16th for ME4U's design team card post featuring three flowers. I'll be using the white washed mist stamped paper on my card with a Sister Stamp image. I think it came out really cute and I can't wait to show you!

Inky, glittery, and misty fingers for all!
-Gaby

ETA: You can find the card that I used the white washed paper on by clicking here. Thanks so much!